



Commercial Roof Flashing Repair Houston

Showtime Exteriors • October 2, 2026

Curbs Penetrations Walls Edges and Leak Prevention
Commercial Roof Flashing Protects the Most Vulnerable Transitions

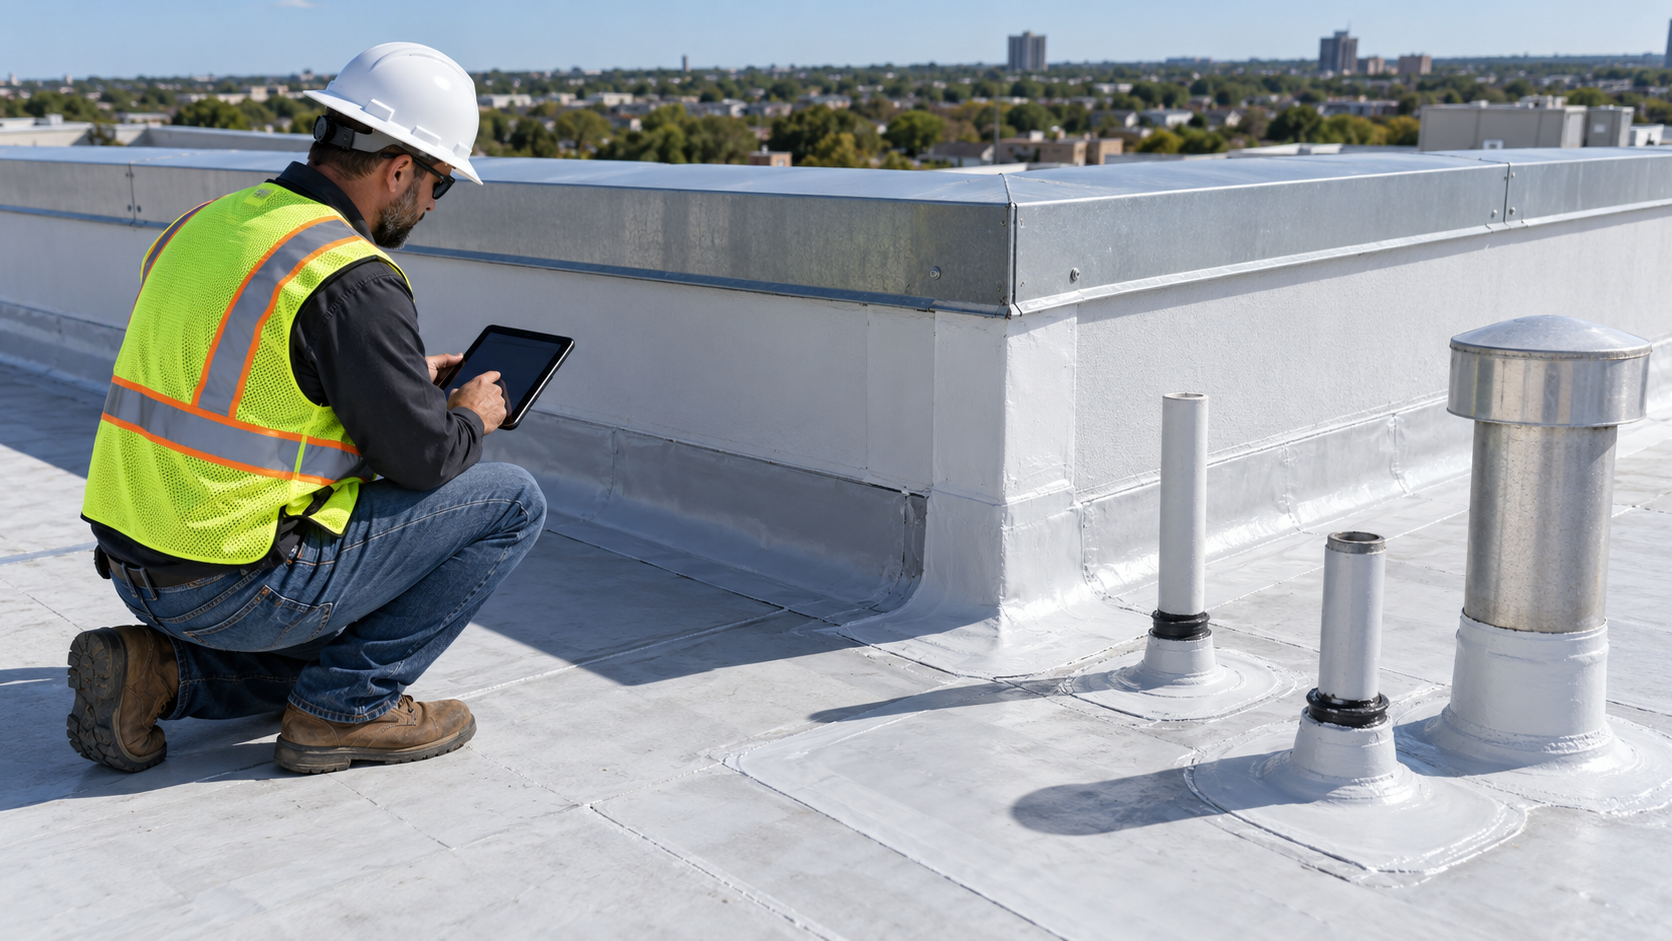
Commercial roof flashing repair in Houston should begin with the transition where water, movement, materials, and building geometry meet. Flashing connects the roof field to curbs, walls, pipes, drains, skylights, expansion joints, edges, equipment supports, and other interruptions. These locations experience concentrated stress and are frequent leak sources, but a wet ceiling below a flashing detail does not automatically prove that detail is the entry point.

A lasting repair identifies the water pathway, evaluates the surrounding assembly, removes failed or wet materials when required, prepares sound substrates, and rebuilds the detail with compatible components. Smearing sealant over a dirty, moving, wet, loose, or incompatible surface may reduce water briefly while making the next investigation harder. Temporary work should be documented and replaced with a permanent scope.

Showtime Exteriors helps commercial owners across Houston and Texas inspect, repair, restore, retrofit, recover, and replace TPO, PVC, EPDM, modified bitumen, metal, coating, and aging built-up roofing systems. Call 817-400-ROOF (7663) to schedule an assessment. The company can document visible conditions and roofing scope without promising insurance coverage or claim approval.

Why Flashing Fails in Houston

Houston exposes commercial roofs to intense ultraviolet radiation, high surface temperatures, humidity, heavy rain, hail, straight-line wind, tropical weather, airborne debris, and abrupt temperature changes. Roof membranes, metals, sealants, fasteners, curbs, walls, decks, and equipment expand and contract at different rates. Flashing absorbs much of that movement because it changes direction and connects dissimilar materials.

Thermal Movement

Long roof areas and metal components can move substantially across daily and seasonal temperature cycles. Movement may pull flashings, stress corners, loosen terminations, open end laps, fatigue sealants, and wrinkle membranes. A repair should allow expected movement rather than rigidly locking a flexible detail to a moving component. Repeated cracking in the same location often indicates that the movement mechanism has not been resolved.

Ultraviolet and Heat Exposure

Sunlight and high temperatures can age exposed sealants, coatings, membranes, tapes, mastics, and plastics. Dark surfaces can become especially hot. A material that once remained flexible may harden, shrink, chalk, crack, or lose adhesion. Surface appearance is only part of the evaluation because deterioration may continue beneath a patch or metal cover.

Wind and Pressure

Wind creates pressure at corners, edges, perimeters, rooftop screens, walls, and equipment. Loose edge metal, weak terminations, displaced counterflashing, open seams, and improperly secured accessories can admit wind-driven rain or allow damage to progress. Perimeter and corner conditions deserve focused inspection after severe weather because loads can be higher than in the roof field.

Rooftop Service Traffic

HVAC, refrigeration, plumbing, electrical, solar, communications, and maintenance work can cut membranes, displace flashings, remove counterflashing, add penetrations, leave fasteners, or apply incompatible sealants. Vendor-control procedures, protected walk paths, approved details, and post-work roof review reduce preventable damage.

Major Types of Commercial Roof Flashing

HVAC and Equipment Curb Flashing

Curb flashing transitions the roof up the sides of rooftop equipment supports. Inspect membrane height, corners, seams, termination, metal counterflashing, equipment overhang, fasteners, sealants, drainage, and signs of movement. Water may enter through the equipment cabinet or curb joint rather than the roof flashing, so roofing and mechanical observations should be coordinated.

Pipe and Conduit Penetrations

Pipes, conduits, refrigerant lines, supports, and grouped penetrations require compatible boots, pitch pans, prefabricated accessories, or reinforced field flashings. The detail must accommodate movement and provide adequate separation for workmanship and inspection. Crowded pipes, low penetrations, unsupported lines, cracked filler, loose clamps, and abandoned openings commonly create problems.

Roof to Wall and Base Flashing

Base flashing turns the roof membrane up parapets, rising walls, penthouses, equipment screens, and transitions. Review flashing height, adhesion or attachment, seams, corners, termination bars, reglets, counterflashing, wall surfaces, coping, and through-wall conditions. Water entering above the roof may travel behind sound base flashing and appear inside at the roof line.

Edge Metal and Perimeter Flashing

Edges help resist water entry and wind forces where the roof terminates. Inspect fascia, gravel stops, cleats, fasteners, joints, sealants, membrane securement, corrosion, deformation, and corners. A loose or poorly integrated edge can allow wind beneath the membrane and expand a local defect into a larger failure.

Drain and Scupper Flashing

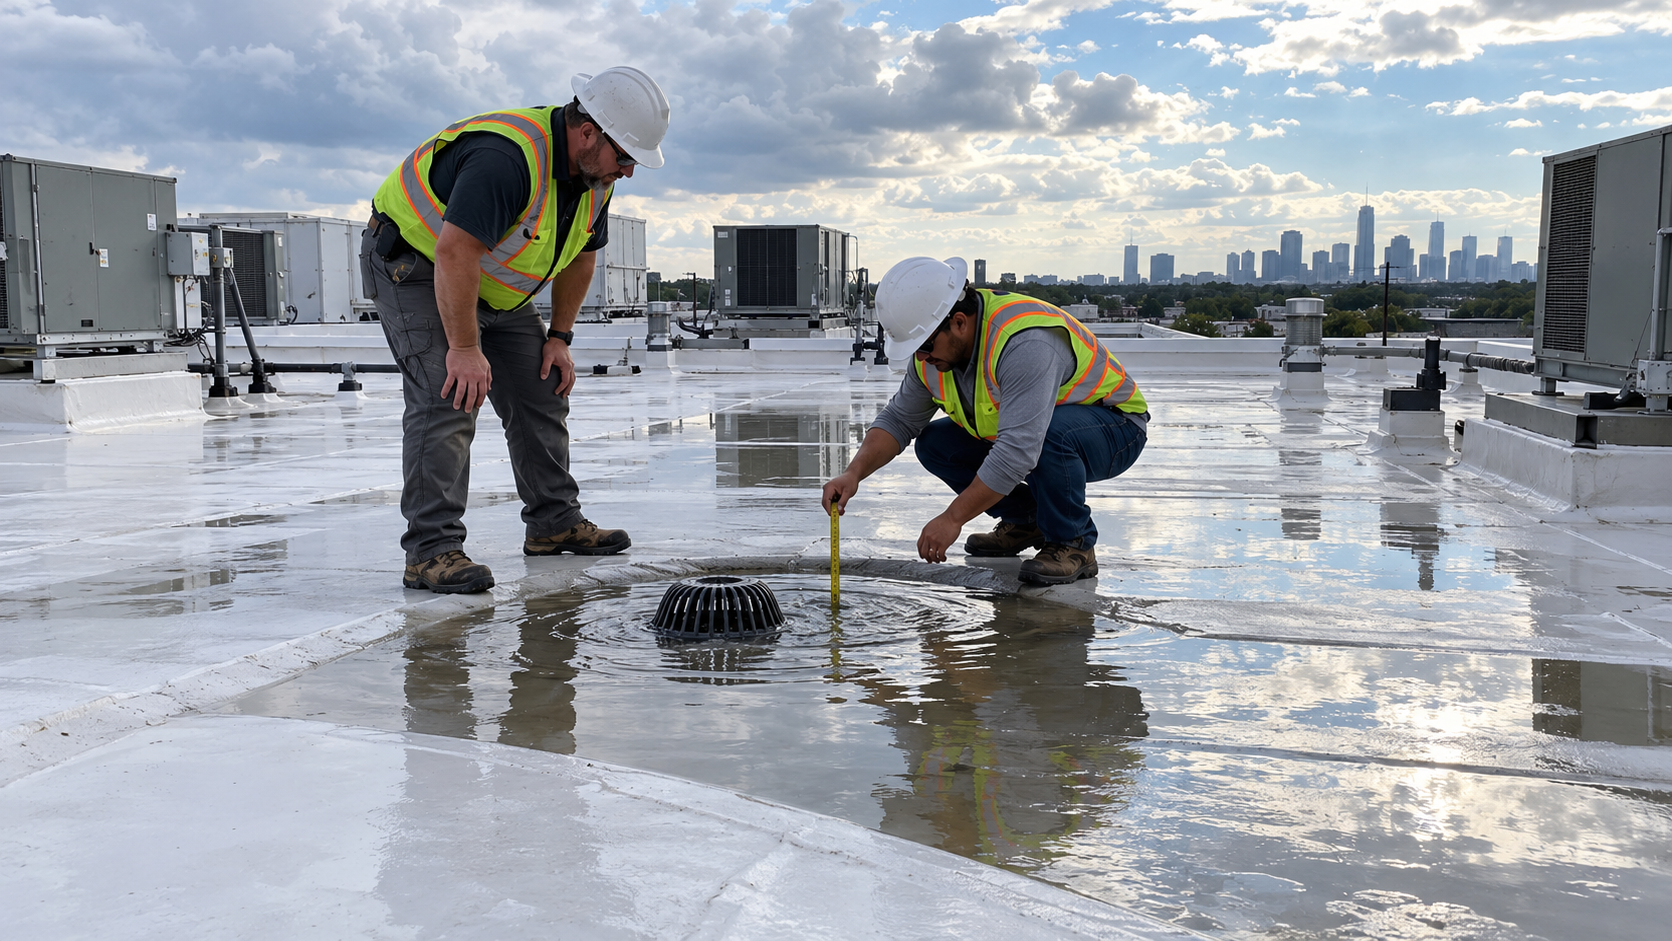
Drain details include the sump, membrane, clamping ring, strainer, drain body, seals, and nearby insulation. Scuppers combine roof, wall, corner, opening, and exterior discharge details. Blockage and ponding can raise water above otherwise serviceable flashings. Roofing and plumbing scopes should be coordinated when drain bodies or internal piping are involved.

Expansion Joint Flashing

Expansion joints are designed to accommodate building movement. Covers, membranes, curbs, transitions, intersections, and terminations must remain flexible and continuous. Rigid patches or excessive sealant can restrict movement and fail quickly. Changes in elevation and intersections with walls or edges require particular attention.

Skylight and Hatch Flashing

Skylights and roof hatches combine curbs, metal frames, seals, fasteners, glazing, lids, and roof flashings. Water can enter through cracked glazing, failed gaskets, frame joints, condensation, or the curb detail. Safety is critical around skylights because they may not support a person even when they look solid.

Warning Signs of Flashing Failure

Exterior signs include open seams, lifted edges, wrinkles, bridging, splits, cracks, loose termination bars, backed-out fasteners, missing counterflashing, failed sealant, corrosion, exposed reinforcement, punctures, deteriorated corners, displaced metal, and repeated patches. Interior signs include stains, corrosion, damp insulation, odors, bubbling finishes, and drips that appear during wind-driven rain or after prolonged storms.

Recurring Leaks at the Same Location

A repair that repeatedly fails may be addressing the visible symptom rather than movement, drainage, wet insulation, unstable substrate, wall leakage, equipment leakage, or an incompatible material. Compare old photographs and invoices. If each repair adds another surface layer without removing failed material, the detail can become harder to diagnose and rebuild.

Sealant as the Only Defense

Sealant is useful in properly designed joints and terminations, but it should not substitute for missing flashing, secure attachment, adequate overlap, compatible seams, or movement accommodation. Thick beads over gaps, dirt, moisture, loose coating, or deteriorated membrane often fail because the substrate cannot support them.

Water Staining Above the Roof Line

Staining, cracks, failed joints, loose coping, porous wall surfaces, and openings above the flashing can allow water behind an otherwise sound roof transition. The investigation should examine walls, windows, louvers, caps, equipment, and penetrations above the symptom. Roofing work alone may not correct a wall or mechanical source.

How a Flashing Inspection Should Be Performed

Map and Label Every Detail

Use a roof plan to identify curbs, pipes, walls, edges, drains, scuppers, skylights, hatches, expansion joints, equipment supports, and earlier repairs. Consistent labels allow interior symptoms, photographs, repairs, and follow-up observations to refer to the same location. On large facilities, generic descriptions such as near the HVAC unit are not precise enough.

Compare Exterior and Interior Evidence

Record the room, ceiling grid, deck flute direction, structural framing, equipment, walls, and timing of interior moisture. Water can travel from the entry point. The shortest visual distance between a stain and a rooftop detail may not be the actual pathway. Review conditions during different wind directions and rainfall intensities when records are available.

Probe and Test Carefully

Seam probing, adhesion checks, moisture meters, infrared scanning, controlled water testing, core samples, and selective openings may be useful when they answer a defined question. Each method has limits. Controlled water testing should avoid flooding the building or confusing adjacent details, and roof openings must be repaired with compatible materials.

State Inspection Limits

Reports should identify inaccessible areas, concealed conditions, active equipment, wet surfaces, unsafe zones, and testing not performed. A visual inspection cannot verify every layer or hidden connection. Clear limitations protect the owner from treating an observation as a guarantee and help define the next investigation step.

Repair Methods by Roof System

TPO and PVC Flashing Repair

Thermoplastic repairs commonly rely on clean, dry, compatible membrane and properly executed heat-welded seams. The contractor may remove failed flashing, replace wet or damaged components, rebuild corners, install prefabricated accessories, reinforce transitions, and verify welds. Contaminated, aged, coated, or incompatible surfaces may require special preparation or a broader replacement area.

EPDM Flashing Repair

EPDM work may use compatible primers, seam tapes, uncured or cured membrane, molded accessories, adhesives, and lap sealant where specified. Surface preparation is critical. Shrinkage stress, poorly attached flashings, wet insulation, and movement should be corrected rather than hidden beneath another patch.

Modified Bitumen Flashing Repair

Modified bitumen details may be repaired using torch-applied, hot asphalt, self-adhered, or cold-process materials depending on membrane type, substrate, fire risk, and facility restrictions. Loose granules, blisters, open laps, cracks, and deteriorated felts should be removed or prepared as required. The repair must tie into sound, compatible material.

Metal Flashing Repair

Metal repair may include replacing panels or trims, correcting laps, installing closures, replacing fasteners, rebuilding curbs, adding compatible sealant systems, treating corrosion, or redesigning movement joints. Exposed-fastener replacement alone may not correct back-pitched laps, poor geometry, failed closures, or deck movement.

Coated Roof Flashing Repair

Coated details require substrate cleaning, removal of loose material, reinforcement, compatible base and finish products, and verified application thickness. Coating should not be applied over active moisture, loose gravel, unstable membranes, uncured sealants, severe corrosion, or unresolved movement. Repairs must follow the coating system requirements.

Temporary Patches Versus Permanent Repairs

Emergency work can protect interiors and reduce immediate water entry when weather or access prevents full correction. Temporary materials should be selected to avoid damaging the roof or preventing a later compatible repair. Photograph the condition before and after, mark the location, state that the work is temporary, and schedule permanent follow-up.

A permanent repair removes failed components as needed, addresses wet or deteriorated materials, restores attachment, accommodates movement, rebuilds the geometry, uses compatible products, and verifies seams or terminations. The owner should receive a clear scope and completion documentation rather than a vague invoice stating that the leak was sealed.

When Flashing Repair Is Not Enough

Widespread Deterioration

If many curbs, walls, edges, and penetrations are failing, isolated repair may become an expensive cycle. Widespread age, embrittlement, moisture, poor attachment, unstable insulation, or incompatible earlier work can make restoration or replacement more responsible. A condition map helps show whether failures are isolated or systemic.

Wet Insulation and Damaged Deck

Wet insulation can reduce thermal performance, lose strength, and contribute to deck corrosion or deterioration. Repair boundaries should extend to serviceable materials and provide a durable tie-in. Suspected structural damage or extensive corrosion should be evaluated by the appropriate qualified professional before roofing work conceals it.

Poor Original Geometry

Low curbs, crowded penetrations, inadequate flashing height, back-pitched surfaces, walls without suitable termination, and details that trap water may continue to fail until they are redesigned. Replacement projects create an opportunity to raise curbs, separate pipes, improve slope, coordinate walls, and provide maintainable clearances.

End of Service Life

A repair can be technically possible while offering little strategic value if the surrounding roof is near replacement. The owner should ask whether the repair provides a reasonable bridge to a planned project or simply adds another layer to a system that can no longer be inspected or maintained reliably.

Aging Gravel Surfaced BUR Makes Flashing Repair Harder

Aging built-up roofs with gravel surfacing align directly with David Washington’s campaign concerns. Gravel can conceal the membrane, flashing tie-ins, blisters, splits, deteriorated felts, previous patches, and moisture conditions. Repair often requires controlled removal of aggregate to expose the actual surface and determine whether sound material remains.

Loose gravel can contaminate repair areas, move toward drains, damage adjacent surfaces, and make photographs or routine inspection less clear. Repeated mastic patches at curbs and walls can become thick, cracked, and difficult to tie into. When moisture or deterioration extends beyond the exposed repair zone, another isolated patch may only delay replacement.

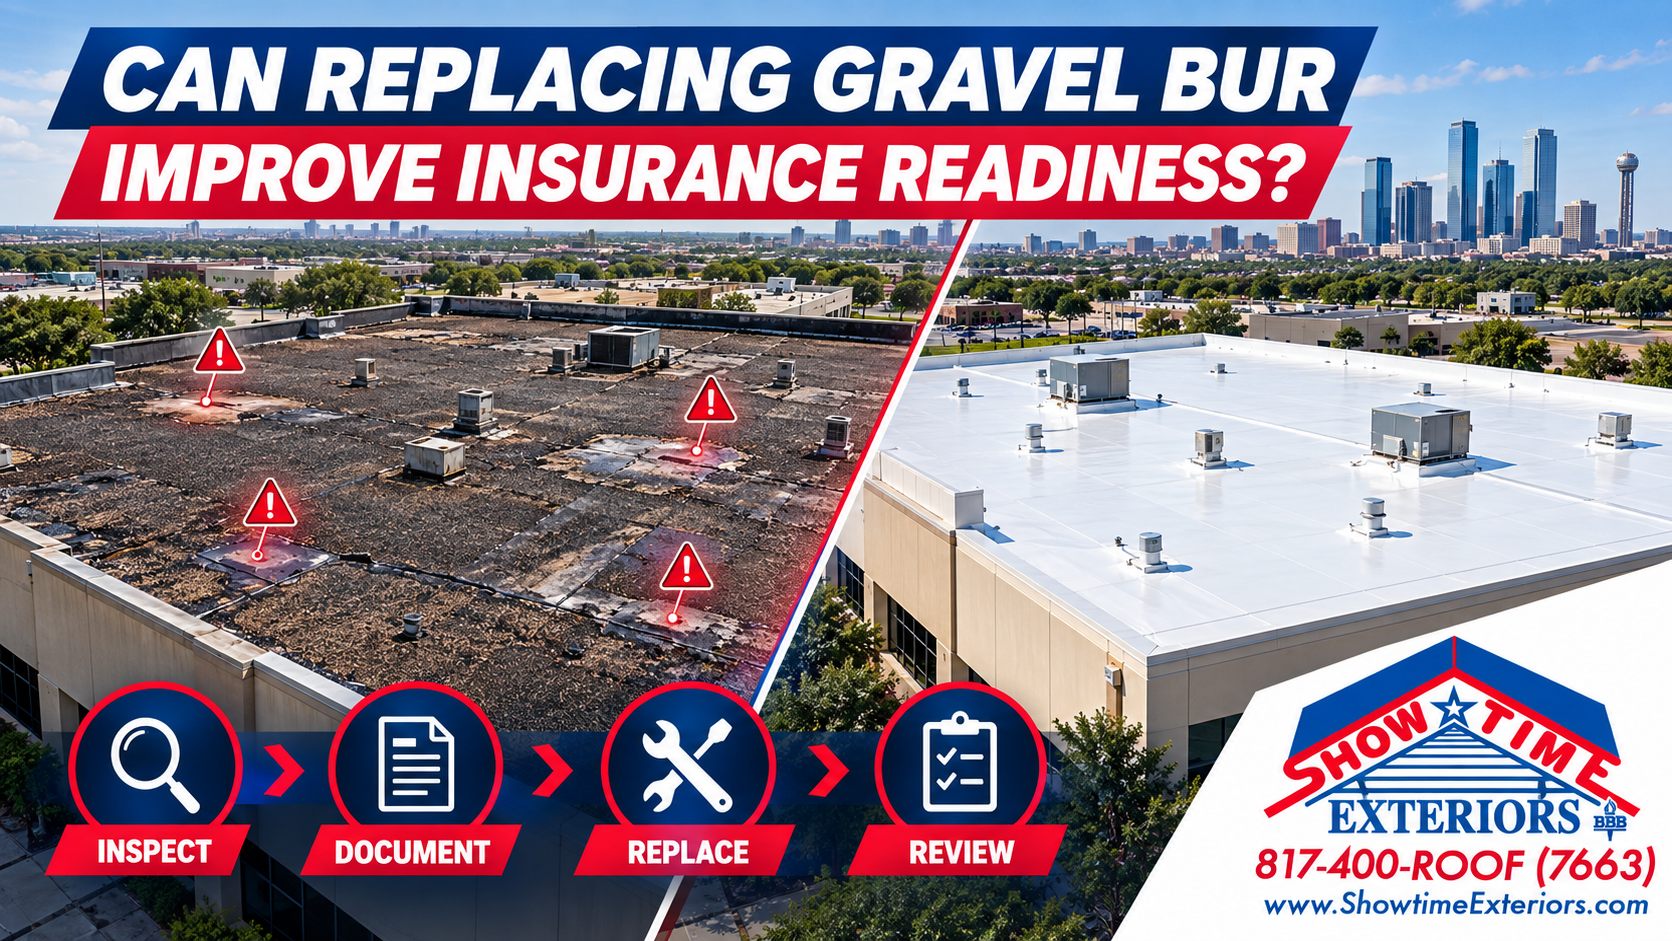
Older gravel BUR roofs may also face stricter insurance underwriting, updated inspection requests, higher deductibles or premiums, coverage limitations, or non-renewal concerns. Outcomes vary by policy, carrier, building, roof age, condition, claims history, and market. Showtime Exteriors can document visible conditions and roofing scope but cannot guarantee coverage or insurability. Owners should consult licensed insurance professionals for policy questions.

Insurance and Storm Documentation

After wind, hail, debris, or heavy rain, protect people and interiors first. Document the date, affected rooms, visible conditions, temporary measures, and professional findings. Wind can lift edges or counterflashing, hail can damage metal and membranes, and debris can puncture flashings. Damage may coexist with age-related deterioration, which is why factual documentation is more useful than immediate conclusions.

Coverage depends on the policy, cause, exclusions, endorsements, deductibles, valuation method, notice, evidence, and carrier evaluation. A contractor can provide measurements, photographs, roof observations, repair or replacement scope, and completion records. The contractor should not act as a public adjuster or attorney and should not promise claim approval.

Preventive Maintenance for Flashing Details

Inspect at Least on a Planned Schedule

Many commercial owners schedule maintenance inspections at least twice each year, commonly in spring and fall, plus additional review after severe weather and rooftop work. Frequency should reflect roof age, system, traffic, building sensitivity, tree cover, equipment density, warranty, and prior leak history. Flashings deserve focused attention because their small area can create large interior consequences.

Control Rooftop Vendors

Require sign-in, designated routes, membrane protection, debris removal, and approval for new penetrations. Photograph conditions before major mechanical work and inspect afterward. A roofing professional should install or approve flashing connections rather than allowing each trade to improvise waterproofing with general-purpose sealant.

Keep Repair Records

Record location, observed condition, preparation, materials, dimensions, substrate findings, weather, completion photographs, and unresolved concerns. Track recurrence by roof-section label. If the same detail fails repeatedly, escalate from patching to a cause-based redesign or capital plan.

Project Planning and Quality Control

Coordinate Roofing and Mechanical Work

Equipment replacement may require curb adapters, raised curbs, temporary openings, electrical or duct work, crane lifts, and interior shutdowns. Establish which contractor owns each interface. The roof should be made watertight daily, and equipment should not be set until curb and flashing conditions are ready for the planned sequence.

Inspect Concealed Stages

Verify substrate, insulation, fasteners, blocking, curb condition, membrane attachment, corners, and termination before metal covers the detail. Photograph each stage. Final appearance cannot prove that concealed components were properly prepared or secured. Manufacturer or consultant observations should occur at the required stage, not after completion.

Test and Close Out

Depending on the system, quality control may include seam probing, test welds, adhesion checks, fastener verification, coating thickness measurements, or controlled water testing. Closeout should include product information, roof maps, warranties, photographs, test results, approved changes, and future maintenance instructions.

Budgeting for Flashing Repair

Cost depends on access, height, system, detail complexity, length or quantity, demolition, wet insulation, deck repair, equipment coordination, interior protection, working hours, materials, warranty, testing, and weather. A single pipe boot differs from rebuilding a long parapet, multiple HVAC curbs, or a perimeter edge. Early allowances should use ranges and state assumptions.

Compare proposals on scope, not total price alone. Confirm preparation, removal, substrate repair, insulation, attachment, flashing height, corner reinforcement, termination, counterflashing, sealants, testing, warranty, and documentation. A low number may exclude the components most likely to become change orders.

Flashing Quality Control by Detail

Curbs and Equipment Supports

A curb detail should be evaluated as a complete assembly rather than a strip of membrane around a box. Confirm that the curb is high enough above the finished roof, properly supported, and shaped so water does not collect against it. Review all four corners, especially the back side that may be difficult to see from the normal access path. Confirm that the membrane is attached or adhered as specified, corners are reinforced, and counterflashing protects the upper termination. Fasteners should not create unintended holes in horizontal water-shedding surfaces. Where equipment vibration or curb movement is present, the repair design should account for that movement instead of depending on a rigid bead of sealant.

Mechanical units can release condensate, oil, heat, and service debris near the curb. Condensate should discharge through a planned route that does not erode coatings, saturate insulation, or create persistent ponding. Grease or chemical exposure can affect some roofing materials, so the roof system manufacturer should be consulted when compatibility is uncertain. After mechanical service, check that access panels, screws, pipes, and tools have not damaged the finished flashing.

Walls Parapets and Copings

Wall details should be reviewed from the roof surface to the top of the wall. A sound base flashing can still receive water from open coping joints, cracked masonry, failed sealant above the termination, loose metal panels, or penetrations through the wall. Inspect inside and outside corners, membrane transitions, termination bars, counterflashing, reglets, coping cleats, cover joints, and end conditions. Staining behind the flashing or corrosion beneath coping can indicate that water is entering above the roofing work.

The permanent solution may require coordinated masonry, sheet-metal, waterproofing, or wall-panel work in addition to roofing. Scope documents should identify those interfaces and assign responsibility rather than assuming one trade will correct every component. When only the roof-side repair is authorized, the report should plainly state any observed wall or coping conditions that remain outside the scope.

Edges and Perimeters

Perimeter details must manage both water and wind. Check that the membrane is continuously secured, edge metal is anchored to appropriate blocking or substrate, joints allow movement, and cleats or splice plates are present where required. Corners, transitions, and terminations at walls deserve special attention because several components converge there. Rust streaks, loose fascia, enlarged fastener holes, rattling metal, open joints, and displaced membrane are reasons for prompt evaluation.

Replacing exposed screws without examining the metal profile, substrate, spacing, corrosion, and joint design may provide only cosmetic improvement. A durable repair may require new blocking, cleats, membrane securement, splice treatment, or a redesigned edge assembly. If wind damage is suspected, document the condition before moving loose components when it is safe to do so, then stabilize hazards and preserve relevant materials according to the owner’s procedures.

Pipes Pitch Pans and Grouped Penetrations

Penetrations need enough separation and height for the selected flashing method. Closely packed pipes can prevent cleaning, reinforcement, welding, rolling, coating, and visual inspection. Unsupported lines may move in wind or during service and transfer stress to the flashing. Abandoned penetrations should be removed and closed with a compatible detail instead of left beneath a cap or mound of sealant.

Pitch pans and pourable-sealer pockets require inspection of the filler, sides, corners, substrate connection, and supported penetrations. Shrinkage, cracking, contamination, and movement can open a pathway around the pipes or perimeter. Refilling the top without addressing loose components or incompatible earlier material can conceal the same failure. Where feasible, a prefabricated boot or redesigned penetration cluster may be more maintainable.

Common Flashing Repair Mistakes to Avoid

Repairing a Wet or Contaminated Surface

Adhesives, tapes, coatings, mastics, and sealants depend on preparation. Moisture, dust, oils, biological growth, loose granules, oxidation, and deteriorated coating can prevent adhesion. Cleaning should follow the selected product requirements, and the substrate must be allowed to dry. Applying more material over a failed surface does not create a sound base. If the existing membrane cannot be prepared to receive a dependable tie-in, the repair area may need to expand.

Mixing Incompatible Materials

Roofing products that look similar may use different chemistries. Solvents can soften or damage some membranes, uncured products can interfere with later coating, and general-purpose sealants may not bond or remain flexible on a roof. Identify the existing system when possible and use compatible primers, membranes, tapes, coatings, fasteners, and accessories. When system identity is uncertain, testing and manufacturer guidance can reduce avoidable failure.

Ignoring Drainage Around the Detail

A flashing may meet ordinary rain exposure but fail when water is repeatedly trapped against it. Inspect slope, crickets, saddles, drains, scuppers, debris, displaced insulation, and settlement around curbs and walls. Repairing the vertical transition without correcting a ponding pocket can keep the detail under prolonged water exposure and accelerate deterioration. Drainage improvements may require tapered insulation, a sump, a cricket, or broader reconstruction rather than a surface patch.

Covering Evidence Before Documentation

Emergency response sometimes requires immediate action, but photographs and notes should be captured first when conditions allow safely. Record the overall roof location, close views, dimensions, interior effects, and materials removed. Preserve a clear sequence showing the pre-repair condition, exposed substrate, wet materials, completed tie-ins, and finished detail. Documentation supports maintenance, budgeting, warranty review, and factual discussions with insurers without turning the contractor into a coverage decision-maker.

Portfolio Planning for Houston Property Owners

Owners with several buildings should use consistent roof names, detail labels, inspection categories, and priority ratings. A portfolio register can track roof type, installation date, warranty, known moisture, recurring leaks, critical interiors, planned equipment work, repair history, and estimated capital year. Flashing observations can then be compared across facilities instead of remaining in separate invoices and email threads.

Priority should reflect consequence as well as defect size. A small opening above a data room, medical space, restaurant kitchen, electrical room, manufacturing line, or occupied tenant area may deserve faster action than a larger defect over a low-consequence zone. Likewise, loose perimeter metal presents a safety and wind risk even before interior leakage appears. Define emergency, near-term, planned-maintenance, and capital categories so teams know what action each finding requires.

Before renewal or acquisition, obtain current photographs and a professional condition assessment rather than relying only on roof age. For aging gravel-surfaced BUR, allow time to expose representative areas, investigate moisture, and compare repair, restoration, retrofit, recover, and replacement paths. Because gravel can hide the membrane and earlier work, a last-minute visual walk may not provide enough evidence for a sound capital or insurance discussion.

A multi-year plan should coordinate roof work with HVAC replacement, solar projects, wall restoration, electrical upgrades, tenant improvements, and drainage changes. Combining compatible work can reduce repeated mobilization and prevent a new trade from cutting into recently completed flashing. The plan should remain flexible after inspections expose concealed conditions, but decisions should be documented so temporary work does not silently become the permanent strategy.

Commercial Roof Flashing Repair Action Plan

Protect people and interiors when active water entry creates a hazard.

Document the timing, weather, interior location, and visible exterior conditions.

Map the suspected detail and compare it with deck direction and surrounding roof geometry.

Inspect the flashing, adjacent membrane, substrate, insulation, wall, equipment, and drainage.

Use targeted testing when visual evidence does not establish the pathway.

Separate temporary stabilization from permanent repair.

Remove failed or wet materials as required and tie into sound compatible components.

Verify seams, fasteners, terminations, corners, and movement details.

Photograph completed work and update the roof history.

Reinspect after suitable weather conditions to confirm performance.

Frequently Asked Questions

What is roof flashing

Flashing is the material and assembly that waterproofs transitions and interruptions such as walls, curbs, pipes, drains, edges, skylights, and expansion joints. It may include membrane, metal, fasteners, tapes, adhesives, sealants, counterflashing, and supporting components.

Can commercial roof flashing be patched

Localized defects can often be repaired when surrounding materials remain serviceable and compatible. The repair should address movement, moisture, substrate, preparation, and attachment. A patch is less appropriate when deterioration is widespread or the detail geometry is fundamentally poor.

Why does flashing keep leaking after sealant

The sealant may be incompatible, poorly prepared, exposed to excessive movement, applied over moisture or dirt, or covering a deeper failure. Water may also be entering through a wall, equipment cabinet, or adjacent detail. Repeated sealant without diagnosis often delays the proper repair.

How quickly should failed flashing be repaired

Active water entry, unsecured metal, open penetrations, or conditions likely to worsen should be addressed immediately when safe. Other deterioration should be prioritized by condition, interior consequence, weather exposure, and the broader roof plan.

Does insurance cover flashing repair

Coverage depends on the policy and cause. Sudden storm damage may be evaluated differently from wear, maintenance, installation defects, or long-term deterioration. Showtime Exteriors can document roof conditions and scope but cannot determine or guarantee coverage.

Why is flashing repair difficult on gravel BUR

Gravel conceals the membrane and tie-ins, contaminates preparation areas, and can hide deterioration, moisture, and earlier patches. Aging gravel BUR may require extensive exposure to find sound material, and replacement may be more responsible when repeated repairs no longer provide a reliable result.

Schedule Commercial Roof Flashing Repair in Houston

Commercial flashing repairs succeed when the contractor diagnoses the pathway, exposes sound materials, coordinates movement and geometry, and documents the completed detail. Do not let temporary mastic become the unexamined long-term solution. Pay particular attention to aging gravel BUR roofs because concealed deterioration and underwriting pressure can make late planning more expensive.

Showtime Exteriors serves commercial property owners across Texas. Call 817-400-ROOF (7663) or visit Showtime Exteriors commercial roofing to schedule an assessment.

Internal Resources

Commercial Roofing Houston

Commercial Roof Repair Houston

Commercial Roof Inspection Houston

Commercial Roof Maintenance Houston

Emergency Commercial Roof Repair Houston

Commercial Roofing Resources

External References

NRCA Roofing Guidelines and Resources

NRCA Technical Resources

IIBEC Technical Resources

SPRI Technical Resources

GAF Commercial Roofing Resources
Sika Roofing Knowledge Center


By Showtime Exteriors • October 2, 2026
Ponding Water Drains Scuppers and Corrective Solutions
By Showtime Exteriors • October 2, 2026
Causes Diagnosis Repairs and Prevention for Texas Facilities
By Showtime Exteriors • October 2, 2026
Repairs Replacement Moisture Control and Production Continuity
By Showtime Exteriors • October 1, 2026
Budgeting Condition Tracking and Capital Planning for Texas Commercial Properties
By Showtime Exteriors • October 1, 2026
Texas Commercial Roofing Decision Guide
By Showtime Exteriors • October 1, 2026
Texas Commercial Roofing Decision Guide
By Showtime Exteriors • October 1, 2026
Texas Commercial Roofing Decision Guide
By Showtime Exteriors • October 1, 2026
Commercial roof replacement rarely begins when the first crew arrives. A successful project usually starts months earlier—with an inspection, a defensible scope, a realistic budget, material decisions, coordination with building operations, and a schedule that accounts for weather and procurement. That planning becomes especially important when a Texas property owner wants the new roof completed before the end of the calendar year. The date on the calendar may matter for capital planning, tenant commitments, insurance renewal, lender requirements, warranty administration, or a discussion with a tax professional. But a year-end target is only useful when the building is ready, the scope is complete, and the work can be performed correctly. The practical sequence is simple: Inspect the existing roof. Define the scope. Approve a realistic budget. Reserve the schedule. Complete and verify the work. Build a permanent project record. This guide explains each step for commercial property owners, facility managers, asset managers, and business owners in Texas. It also addresses aging gravel-surfaced built-up roofs, replacement-system choices, occupied-building coordination, insurance documentation, and the limits of year-end tax planning. Showtime Exteriors provides commercial roof inspections, repair, retrofit, restoration, and replacement planning across Texas. To discuss a building, call 817-400-ROOF (7663) or visit the commercial roofing page . The Short Answer: How Early Should You Plan a Year-End Commercial Roof Replacement? Start as early as practical. A straightforward project on a small, accessible building may move quickly, but a large or complicated commercial roof can require weeks or months of preparation before installation begins. The schedule may include investigation, moisture testing, engineering, budgeting, permits, insurer or lender review, material ordering, rooftop-equipment coordination, tenant notices, safety planning, tear-off, installation, punch-list work, and closeout. Working backward from December 31 is more useful than choosing an arbitrary start date. First identify the date by which the roof must be substantially complete, inspected, invoiced, or placed in service for the owner’s specific business purpose. Then add time for each decision and contingency. A year-end project becomes harder when an owner waits for an active leak, an insurance-renewal warning, or a severe storm to force the decision. Emergency conditions compress choices. Planning early gives the owner time to compare repair, restoration, retrofit, and replacement on their merits. A Practical Planning Window Every building is different, but owners should think in phases rather than days: - Investigation and decision-making: roof history, inspection, testing, option analysis, and budget approval. - Preconstruction: final scope, contract, permits, submittals, procurement, staging, and coordination. - Construction: mobilization, daily production, weather delays, quality checks, and cleanup. - Closeout: punch list, final documentation, warranty submission, maintenance guidance, and accounting records. If the property has an aging gravel-surfaced built-up roof, allow additional investigation time. Gravel can obstruct a clear view of the membrane and can make it harder to map cracks, blisters, deteriorated patches, seams, and moisture pathways. The owner should not assume that a quick surface look tells the full story. Why Year-End Roof Projects Need More Planning Than a Normal Repair A repair is often limited to a defined defect. Replacement affects the full roof assembly and many systems connected to it. The project may involve insulation, drainage, curbs, penetrations, wall flashings, parapets, edge metal, rooftop units, electrical service, access routes, and interior operations. Year-end deadlines add four pressures. Weather Becomes Less Predictable Texas does not have one uniform climate. North Texas may experience large temperature swings, strong winds, hail, and occasional freezing conditions. Gulf Coast markets face humidity, heavy rainfall, and tropical-weather exposure. Some roofing materials and adhesives have temperature, moisture, or wind limitations. A professional schedule must leave room for safe shutdowns and weather recovery. Material and Equipment Lead Times Can Control the Start Date The membrane itself may not be the only long-lead item. Insulation, fasteners, edge metal, drains, specialty flashings, skylights, curbs, or custom-fabricated components may determine when work can begin. A complete scope allows the contractor to identify these items before mobilization. Occupants and Rooftop Trades Need Coordination Retailers, offices, restaurants, medical users, manufacturers, warehouses, data operations, and multifamily communities have different tolerance for noise, odor, vibration, blocked entrances, or rooftop shutdowns. HVAC, plumbing, electrical, solar, security, and fire-protection contractors may need to participate. Coordination must be built into the plan rather than improvised during production. Administrative Deadlines Are Not Construction Deadlines A budget cycle, insurance renewal, lease obligation, or tax discussion may establish a target. None of those dates changes the physical requirements of the roof. The assembly still needs proper substrate preparation, drainage, attachment, flashing, and quality control. The objective should be a durable, documentable roof—not merely a rushed invoice. Step 1: Inspect the Commercial Roof Before Choosing a Solution The first question is not, “Which new membrane should we buy?” It is, “What condition is the existing roof assembly in?” A useful commercial roof assessment should document the roof type, approximate age, number of known layers, drainage configuration, visible defects, prior repairs, penetrations, rooftop equipment, perimeter conditions, and signs of interior moisture. It should also identify areas that require additional testing. What the Visual Inspection Should Cover The inspection should include, as applicable: - membrane condition and surface wear; - open seams, splits, punctures, blisters, fishmouths, and failed patches; - ponding or evidence of slow drainage; - drains, scuppers, gutters, and downspouts; - penetrations, pitch pans, curbs, pipes, and equipment supports; - base flashings, termination bars, parapets, and coping; - edge metal and wind-sensitive perimeter zones; - rooftop traffic patterns and service paths; - displaced materials or storm-related damage; - interior staining, wet ceiling materials, or recurring leak locations. Photographs should be labeled and tied to a roof plan whenever possible. A folder of random closeups is less useful than evidence that shows where a condition exists and how it relates to drainage, penetrations, or interior reports. For a deeper documentation framework, see Showtime Exteriors’ commercial roofing resources . When Testing May Be Appropriate A visual inspection cannot always determine what is happening below the surface. Depending on the roof and project goals, the owner and roofing team may consider core samples, infrared scanning, electronic leak detection, adhesion testing, or other targeted investigation. The purpose is to reduce uncertainty about trapped moisture, insulation condition, deck type, roof layers, and attachment. Testing is not a substitute for professional judgment, and not every test fits every assembly. The scope should state what was tested, where, under what conditions, and what conclusions can reasonably be drawn. Why Gravel-Surfaced BUR Requires Extra Scrutiny An aging built-up roof with gravel surfacing can present a visibility problem. Aggregate may conceal the membrane and make it difficult to see deterioration without removing material in selected areas. Moisture, failed repairs, cracks, blisters, and drainage defects may not be obvious during a quick walkover. That uncertainty matters when a property owner is preparing for insurance renewal, evaluating recurring leaks, or deciding whether additional patching is financially defensible. A long history of repairs does not automatically mean the assembly remains a good candidate for more repairs. Showtime Exteriors’ campaign position is clear: an old gravel BUR should be evaluated as a potential building, maintenance, and insurance liability—not promoted as an advantage. If it has reached the point where defects are difficult to verify, repairs are multiplying, or moisture is widespread, replacement or an engineered retrofit may provide a more transparent long-term path. Step 2: Build a Defensible Scope of Work The inspection describes current conditions. The scope defines what the project will do about them. A strong scope should be specific enough for the owner to understand the assembly being purchased and for bids to be compared meaningfully. If one proposal assumes a recover system and another assumes full tear-off, the prices do not represent the same project. Core Scope Decisions The project team should answer the following questions: Will the existing roof remain, be partially removed, or be completely removed? Is the deck suitable for the proposed attachment method? Is wet insulation isolated or widespread? Does drainage need correction? What insulation type and thickness are proposed? What membrane or roof system is appropriate for the building? How will perimeter, corner, wall, curb, and penetration details be handled? Which rooftop units or penetrations must be raised, replaced, disconnected, or abandoned? What manufacturer and contractor warranty terms are expected? What testing, inspections, and closeout documents will be provided? Repair, Restore, Retrofit, or Replace? Owners should compare four possible paths. Repair is appropriate when defects are limited, the surrounding roof remains serviceable, and the work can restore watertight performance without chasing widespread failures. Restoration may be considered when the existing assembly is dry enough, well attached, compatible with the proposed system, and capable of being prepared to the manufacturer’s requirements. Coatings should not be used to hide saturated insulation or structural problems. Retrofit or recover can reduce tear-off in appropriate conditions, but it requires confirmation that the existing assembly, deck, moisture conditions, drainage, weight, and code considerations support the approach. Learn more in Showtime Exteriors’ guide to a TPO roof retrofit over an existing metal roof in Texas . Replacement is often the clearest path when the assembly has widespread moisture, repeated failures, deteriorated components, incompatible layers, inadequate attachment, or a condition that cannot be reliably assessed and repaired. Correct the Causes, Not Just the Symptoms A new roof should not automatically repeat the old configuration. If poor drainage, low curbs, uncontrolled foot traffic, failing edge details, or equipment discharge shortened the previous roof’s life, the replacement scope should address those conditions. Drainage deserves particular attention. Ponding can accelerate deterioration, increase leak exposure, collect debris, and complicate maintenance. Where appropriate, the plan may include drain service, tapered insulation, additional drainage, scuppers, or retrofit roof drains . Step 3: Create a Realistic Commercial Roof Budget The lowest initial number is not necessarily the lowest long-term cost. A commercial roof budget should include the full project, not just membrane installation. What Can Affect Commercial Roof Replacement Cost? Major cost variables include: - total roof area and geometry; - height, access, and staging constraints; - existing roof type and number of layers; - tear-off and disposal requirements; - wet-insulation replacement; - deck repair or replacement allowances; - insulation thickness and energy requirements; - membrane type, thickness, reinforcement, and attachment; - edge metal, coping, wall flashings, and custom fabrication; - drains, scuppers, gutters, and tapered insulation; - penetration and equipment details; - crane, lift, or material-handling requirements; - work-hour restrictions and occupied-building protections; - manufacturer warranty requirements; - weather and contingency allowances. A credible proposal should identify assumptions and exclusions. Unknown deck conditions or concealed moisture may require unit pricing or allowances. That is better than pretending the uncertainty does not exist. Compare Lifecycle Value, Not Just Bid Price Ask what each option is designed to accomplish. One scope may be a short-term repair strategy. Another may replace the full assembly, improve drainage, add insulation, and include a stronger warranty. Those options should not be judged by price alone. The owner should consider anticipated ownership period, tenant expectations, energy use, maintenance capacity, insurance objectives, and the consequences of another leak. Downtime, damaged inventory, interrupted patient care, tenant complaints, interior reconstruction, and lost productivity can exceed the price difference between scopes. Keep a Contingency for Concealed Conditions Commercial roofing frequently involves conditions that are not visible until work begins. A project contingency can cover reasonable quantities of wet insulation, deteriorated decking, hidden abandoned penetrations, or other verified conditions. The contract should explain how additional work is documented and approved. A disciplined year-end roof plan moves through six stages: inspect, scope, budget, schedule, complete, and document. Step 4: Reserve the Schedule and Protect Building Operations Once the scope and budget are approved, the project moves from analysis into logistics. A year-end deadline requires a schedule that accounts for procurement, weather, safety, occupants, and inspections. Work Backward From the Real Completion Requirement Ask why the deadline matters. Is the objective to stop recurring leaks before a seasonal storm pattern? Complete work before a tenant move-in? Satisfy an insurer? Use an approved capital budget? Place an asset in service before year-end after consulting a tax professional? The answer affects documentation and timing. Contract signing, material delivery, substantial completion, final inspection, warranty acceptance, payment, and placed-in-service status are not interchangeable. Build an Occupied-Building Plan Commercial roof work can often proceed while a building remains open, but operations must be considered in advance. The plan may address: - work zones and restricted areas; - pedestrian and vehicle routes; - material loading and crane picks; - noise-sensitive hours; - odor and air-intake management; - temporary shutdown of rooftop equipment; - interior protection under active work; - daily dry-in and weather monitoring; - communication with tenants and facility staff; - emergency contacts and escalation procedures. OSHA provides extensive resources on fall protection in construction and heat exposure , both of which are relevant to Texas roof operations. Safety planning belongs in the project, not in a last-minute checklist. Do Not Let a Deadline Override Weather Limitations Roofing crews need safe conditions and manufacturers require proper installation conditions. Wind, rain, surface moisture, temperature, and approaching storms may stop work. The schedule should include contingency days and a daily plan for keeping the building dry. Pressure to “finish by Friday” cannot justify installing over wet materials, skipping preparation, or leaving incomplete flashings. A delayed but properly executed detail is better than a rushed condition that causes years of leaks. Step 5: Select the Right Roof System for the Building There is no single best commercial roof for every Texas property. The right system depends on deck, slope, drainage, occupancy, rooftop traffic, chemical exposure, wind design, hail exposure, energy goals, budget, and maintenance plan. Showtime Exteriors evaluates systems including TPO, PVC, EPDM, modified bitumen, metal, and appropriate coating or retrofit assemblies. Its overview of the best commercial roofing materials for Texas explains how these choices differ. TPO TPO is a heat-welded single-ply membrane commonly used on commercial low-slope roofs. White membranes can provide high reflectivity, while welded seams and a broad range of accessories support many layouts. Performance depends on membrane selection, attachment, substrate preparation, detailing, and installation quality. PVC PVC is another heat-welded single-ply option. It may be considered where particular chemical or grease exposures make compatibility important. The project team should evaluate the building’s actual operations rather than assume all single-ply products perform the same way. EPDM EPDM is a rubber membrane with a long history in low-slope roofing. Seams and flashings are generally adhered rather than heat welded. Color, attachment, hail strategy, and rooftop conditions should be considered for the specific Texas property. Modified Bitumen Modified bitumen uses asphalt-based sheets with reinforcement and can be installed in different configurations. It may suit buildings where redundancy, traffic tolerance, or familiarity with asphaltic systems is valued. Installation method and fire-safety requirements must fit the site. Metal Roofing and Metal Retrofit Metal can offer long service potential when panels, seams, clips, fasteners, transitions, penetrations, and perimeter details are correctly designed. Existing metal roofs may also be candidates for repair, coating, or membrane retrofit, depending on structural and moisture conditions. Roof Coatings Coatings can be a restoration tool for suitable, dry, stable substrates. They are not a universal replacement for damaged insulation, failed decking, or chronic moisture. Adhesion testing, surface preparation, reinforcement details, drainage, thickness, and manufacturer requirements all matter. Step 6: Complete the Project With Quality Control Construction quality is created through repeatable controls: approved materials, trained crews, substrate preparation, weather monitoring, detail verification, daily cleanup, and documented corrections. Preconstruction Meeting Before mobilization, the owner, contractor, facility representative, and relevant trades should review access, staging, work hours, safety boundaries, emergency contacts, weather procedures, interior protections, rooftop equipment, daily reporting, and change authorization. Daily Project Controls Useful daily records may include crew activity, weather, areas completed, materials installed, deck or moisture findings, photographs, deliveries, delays, and approved changes. These records create transparency and support the final closeout package. Inspections and Punch List Depending on the project, inspections may be performed by the contractor, manufacturer representative, consultant, engineer, building official, owner’s representative, or a combination. Observed defects should be corrected before closeout. The owner should know who is inspecting what and what document confirms acceptance. Warranty Review A warranty is not one simple promise. Owners should distinguish among manufacturer material coverage, manufacturer system or labor-and-material coverage, contractor workmanship terms, exclusions, maintenance obligations, leak-notification requirements, and transfer provisions. Before selecting a proposal, review Showtime Exteriors’ guide on how to hire a roofer with the best warranty coverage in Texas . Step 7: Document the Roof Replacement From Start to Finish A commercial roof is a major building asset. Its file should be organized like one. What the Closeout File Should Contain The owner’s permanent project file may include: - preconstruction inspection and roof plan; - moisture-test or core-cut findings; - signed proposal, contract, and approved scope; - product data and manufacturer submittals; - permits and inspection records, if applicable; - approved change orders; - progress and concealed-condition photographs; - daily or weekly project reports; - final punch list and completion confirmation; - invoices and proof of payment; - manufacturer and contractor warranties; - maintenance instructions and inspection schedule; - contact information for future service; - insurance, lender, and accounting correspondence. The file supports future maintenance, warranty service, property transactions, insurer questions, capital accounting, and tax review. It also reduces confusion when facility personnel change. Establish a Baseline Inspection After completion, preserve clear overview and detail photographs of the new roof. Record drains, flashings, penetrations, edge conditions, rooftop equipment, and designated walk paths. This creates a baseline for future inspections and helps distinguish installation conditions from later damage or third-party activity. Control Future Rooftop Work Many roof problems begin after installation when other trades cut, puncture, drag equipment across, or improperly seal the assembly. Require rooftop contractors to coordinate access, protect traffic paths, and document penetrations. Preserve warranty requirements whenever mechanical, electrical, plumbing, solar, or communications work affects the roof. Section 179 and Year-End Roof Replacement: What Owners Should Know Some commercial property owners plan roof projects before year-end because they want to ask whether the cost may qualify for a Section 179 deduction. This is a tax question, not a roofing guarantee. The IRS explains in Publication 946 that Section 179 may apply to certain qualified real property, including roofs placed in service after the date nonresidential real property was first placed in service. Eligibility, limits, taxable-income rules, business use, entity structure, elections, and placed-in-service timing can change the result. “Paid for” and “Placed in Service” Are Different Concepts Signing a contract or paying a deposit does not necessarily establish that an improvement was placed in service. The owner’s CPA or tax attorney should determine what placed in service means for the specific property and facts. IRS Form 4562 and its instructions are central to claiming depreciation and Section 179 deductions. Section 179 Is Not Section 179D Section 179 and the energy-efficient commercial buildings deduction commonly called Section 179D are different provisions. The IRS maintains a separate page for the Energy Efficient Commercial Buildings Deduction . Do not use the terms interchangeably. Residential Rental Property Requires Separate Analysis The roof provision described for Section 179 concerns certain improvements to nonresidential real property. Owners of residential rental property should not assume the same rule applies. IRS Publication 527 discusses residential rental property, but a qualified tax professional should evaluate classification, activity, ownership structure, and the specific improvement. The Roof Decision Should Stand on Building Fundamentals A possible deduction should not turn an unsuitable roof project into a good one. The property still needs the correct scope, compatible system, safe installation, and realistic lifecycle plan. Tax treatment may affect timing or cash-flow analysis, but it should not substitute for evidence about the roof. Showtime Exteriors does not provide tax, legal, accounting, insurance, or engineering advice. Property owners should coordinate with appropriately licensed professionals before relying on a deduction, code interpretation, coverage decision, or structural conclusion. A Month-by-Month Year-End Planning Example The following is an illustrative workflow, not a promise that every project will follow the same schedule. Four to Six Months Before the Target Date - Gather roof history, leak logs, warranties, plans, and repair invoices. - Schedule the professional inspection. - Identify potential testing needs. - Review insurance-renewal, lease, lender, and capital-budget dates. - Discuss business timing with the CPA if tax treatment is relevant. Three to Four Months Before the Target Date - Compare repair, restoration, retrofit, and replacement options. - Select the preferred system and preliminary scope. - Resolve drainage and rooftop-equipment questions. - Obtain and evaluate proposals on equivalent scopes. - Approve capital and contingency budgets. Two to Three Months Before the Target Date - Execute the contract. - Complete submittals, engineering, permits, and manufacturer requirements as applicable. - Order long-lead materials. - Coordinate HVAC, electrical, plumbing, security, and other rooftop trades. - Prepare tenant and operations communication. One Month Before Mobilization - Hold the preconstruction meeting. - Confirm staging, access, interior protection, work hours, and emergency procedures. - Review weather and dry-in plans. - Verify material deliveries and proposed sequence. - Establish daily reporting and change-order processes. During and Immediately After Construction - Maintain daily communication. - Photograph concealed conditions and completed details. - Document approved changes. - Complete inspections and punch-list corrections. - Collect warranties, invoices, maintenance instructions, and completion records. - Ask the tax professional—not the roofer—to determine applicable tax treatment. Common Mistakes That Put Year-End Completion at Risk Waiting for the First Major Leak The first visible interior leak may not be the first moisture entry. Water can move through insulation, deck channels, or structural components before appearing inside. Early inspection provides more choices. Bidding an Undefined Project When contractors bid different assumptions, the lowest price can conceal omitted work. Define tear-off, insulation, attachment, drainage, metal, penetrations, warranty, testing, and allowances before comparing totals. Treating Gravel BUR as Easy to Evaluate An aging gravel surface can hide the very conditions an owner needs to understand. Do not use surface appearance alone to justify continued patching or a recover system. Ignoring Rooftop Equipment Low curbs, obsolete units, leaking lines, abandoned penetrations, and poorly supported conduit can undermine a new roof. Coordinate related trades before the roofing crew reaches those areas. Scheduling With No Weather Contingency A plan that only works under perfect weather is not a plan. Include safe shutdown criteria, daily dry-in procedures, and recovery time. Choosing a System Before Understanding the Building Material preference should follow investigation. The best assembly is the one that fits the substrate, climate exposure, occupancy, drainage, wind design, maintenance plan, and budget. Treating the Tax Deadline as a Roofing Specification Tax planning may affect timing, but it cannot determine whether a roof is dry, well attached, or properly detailed. Complete the right project and let the tax professional evaluate the treatment. Frequently Asked Questions Can a commercial roof replacement be completed before December 31? Possibly, but feasibility depends on roof size, condition, scope, material availability, approvals, weather, access, and contractor capacity. Schedule an inspection early enough to build a realistic plan. Do not rely on a completion promise made before the roof and logistics are evaluated. How long does commercial roof replacement take? Installation can range from days to many weeks, while total planning and procurement can take much longer. Tear-off quantities, deck repairs, weather, equipment coordination, access, and inspections all affect duration. Can a business remain open during roof replacement? Often, yes. The project should include an occupied-building plan addressing access, noise, odor, HVAC intakes, interior protection, staging, deliveries, and emergency communication. Some activities may need to occur during off-hours or in phases. Should an old gravel built-up roof be repaired again or replaced? That depends on moisture, attachment, deck condition, defect distribution, repair history, drainage, and remaining serviceability. When gravel conceals widespread problems, leaks recur, or repairs no longer provide predictable performance, replacement or a properly evaluated retrofit may be more defensible than continued patching. Can TPO be installed over an existing commercial roof? Sometimes. A recover or retrofit requires evaluation of moisture, deck condition, existing layers, attachment, drainage, weight, compatibility, code considerations, and manufacturer requirements. Wet or deteriorated materials should not simply be concealed under a new membrane. Does a new commercial roof qualify for Section 179? Certain roof improvements to nonresidential real property may qualify, but eligibility is fact-specific and subject to tax rules and limitations. Ask a CPA or tax attorney to review the property, entity, project, timing, business use, and placed-in-service facts. A roofing contractor should not promise a deduction. What does “placed in service” mean for a roof? It is a tax concept generally tied to when property is ready and available for its intended use, but the determination depends on facts. Contract date, payment date, installation date, substantial completion, final acceptance, and actual use may not be identical. Get advice before setting the project deadline. What documents should I give my CPA? Provide the executed contract, detailed scope, invoices, payment records, completion or acceptance documentation, warranty, photographs, property-use information, and any allocations for related work. Let the CPA decide what else is necessary and how costs should be classified. What should be included in a commercial roof warranty review? Review who issued the warranty, what is covered, duration, dollar or remedy limitations, exclusions, maintenance obligations, leak-reporting procedures, transfer rules, and whether contractor workmanship is separate from manufacturer coverage. How can I reduce operational disruption? Plan work zones, access routes, loading, noise-sensitive hours, HVAC coordination, interior protection, daily dry-in, tenant notices, and escalation contacts. Phasing the roof can keep sensitive operations separated from active work. Start the Year-End Roof Plan With Evidence A strong year-end commercial roof plan is not built around urgency alone. It is built around evidence and sequence: Inspect. Scope. Budget. Schedule. Complete. Document. That process gives the property owner a clearer decision, gives the contractor a buildable plan, protects occupants and operations, and creates a permanent record for maintenance, warranty, insurance, accounting, and future ownership. If your property has recurring leaks, an aging gravel-surfaced BUR system, a pending insurance renewal, or a capital deadline, begin with a professional assessment. Showtime Exteriors helps Texas commercial property owners evaluate the roof, compare practical options, and plan work around the building’s needs. Call 817-400-ROOF (7663) or visit Showtime Exteriors commercial roofing to schedule an evaluation. Important disclaimer: This article provides general educational information and is not tax, legal, accounting, insurance, engineering, or code advice. Tax rules, product requirements, building conditions, insurance standards, and project schedules vary. Consult qualified professionals for decisions involving your property.
By Showtime Exteriors • September 29, 2026
Texas Commercial Roofing Decision Guide
By Showtime Exteriors • September 27, 2026
Texas Commercial Roofing Decision Guide